The best way to learn programming is by getting your hands dirty and building projects of whichever scope or complexity. The same applies when learning React. Starting with simpler projects and gradually moving on to more complex ones builds up confidence.
With that in mind, we will be creating a simple Unsplash-gallery web application using React in this blog. A glimpse of what you will be building can be found here.
Introduction
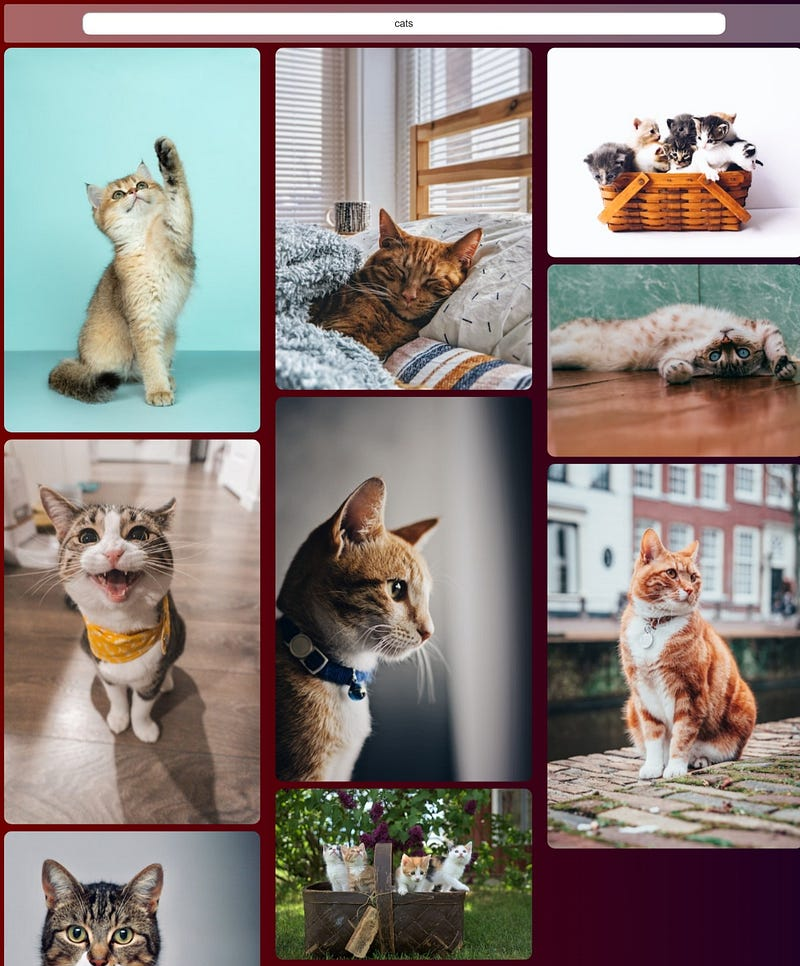
The application will connect to the Unsplash API, retrieve the images we will search for, and then render them using React. The Unsplash API is free to use and provides access to a multitude of royalty-free images that you can use in your projects.
By building this project, you will learn:
how to apply varying React hooks,
the basic functionality of Axios, and
how to create a masonry css layout in React.
Our application will not require a backend necessarily since React allows us to use client-side APIs such as Fetch API or Axios to make HTTP requests to external APIs directly.
Prerequisites
Basic knowledge of React and React hooks: We will be using React a JavaScript frontend framework to build this application hence a good understanding of it is required to implement this project.
Node js and npm (Node Package Manager) installed: Node is required to install and manage the dependencies of a React project. To install node, visit nodejs.org and install the latest stable version on your PC. Npm is a package manager built on Node, so no need to download it separately as it already comes with Node.
An Unsplash API key: This is the most essential part of our application since it is how we will obtain images for it. The API documentation provides a clear way of how to get the API key: Unsplash API Documentation | Free HD Photo API | Unsplash
An IDE: You require a place to write and run your code. Preferably VS code.
Setting up the development environment
Assuming you have already met the above prerequisites, the next steps are:
- Initialize a new React project: You can do this by using the Create React App tool. Open your terminal and navigate to the directory where you want to create the project. Run the command:
npx create-react-app Unsplash-Gallery
This creates a new React project folder named Unsplash-Gallery with all the necessary dependencies.
2. Obtain your Unsplash API access credentials: Refer to the “Prerequisites” section for instructions on creating an Unsplash API account and obtaining your API key.
With the development environment ready, you’re all set to undertake the next steps. Let’s dive right in:
Creating the ImageGallery component
The ImageGallery component will house the core functionality of our application, which is, searching for images, fetching the results, and displaying them.
In the src directory of the React project, open the App.js file and start by modifying the default starter code as shown below:
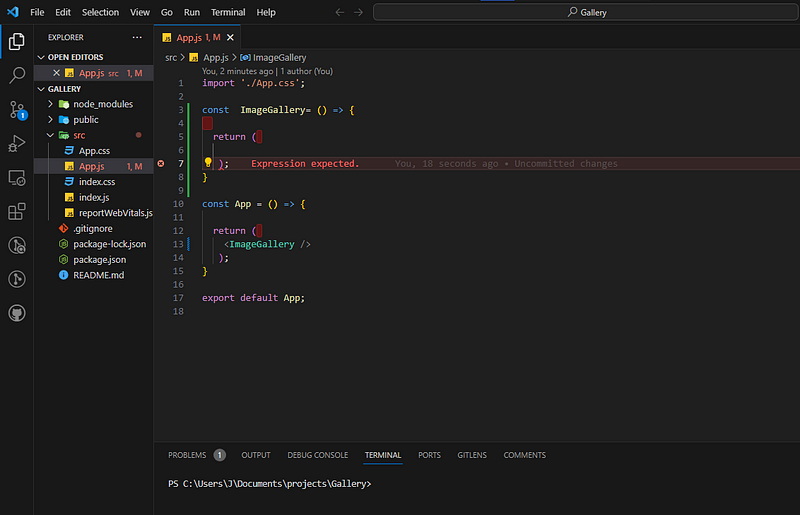
Then implement the search bar functionality in the ImageGallery component:
In the code above the searchItem state variable is used to keep track of the input value entered. The onChange event listener which calls the handleChange function whenever the input changes, allows for the searchItem state variable to be updated every time the value of the input element changes.
Fetching images from the Unsplash API
Axios, a promise-based HTTP client, is what we will be using to make our requests to the Unsplash API. It is a widely used JavaScript library that simplifies making HTTP requests from both browsers and Node.js environments.
To install Axios, open your terminal/command prompt, navigate to your project’s root directory and run the command:
npm install axios
After installing Axios, you can verify that it’s correctly added to your project by checking your project’s package.json file. Axios should appear as a dependency in the “dependencies” section.
Storing the API key in an environment variable
It is not recommended to include API keys in your React code. Instead, store them as environment variables. A React application created using create-react-app (what we used) supports environment variables out of the box. This is how we’re going to store our Unsplash API key.
Create a new file called .env in the root directory of the React application. The API key name should be prefixed with REACT_APP. In this case:
REACT_APP_UNSPLASH= YOUR_CLIENT_ID
The API key can be accessed in any file in our React app using: process.env.REACT_APP_UNSPLASH
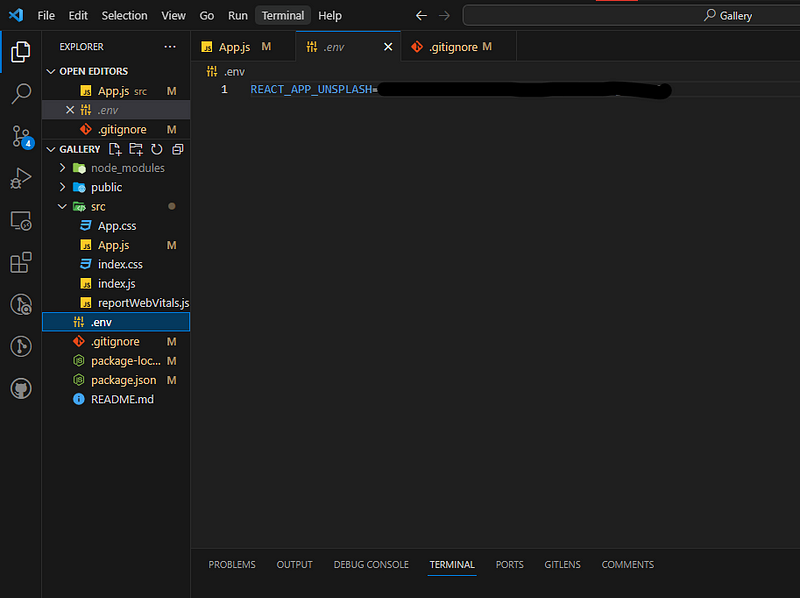
Ensure you add .env to the .gitignore file to prevent git from tracking it.
With Axios installed and the API key in place, the next step is to add the image fetching functionality to the ImageGallery component.
Here is the code:
A quick breakdown:
The useEffect hook is executed whenever the searchItem state variable changes. This ensures a new API request is made whenever the search query input changes. You can learn more about the useEffect here: https://medium.com/stackademic/what-is-the-useeffect-in-react-1faeda2e2567
The requestUrl variable is constructed using a template string and includes a search query(searchItem), the number of results to return per page(per_page), and a client ID which is stored in the REACT_APP_UNSPLASH environment variable created.
The requestUrl variable is constructed using a template string and includes a search query(searchItem), the number of results to return per page(per_page), and a client ID which is stored in the REACT_APP_UNSPLASH environment variable created.
Axios is used to make the HTTP GET request to the specified requestUrl. In the .then block, the response data from the API is accessed using response.data.results. The data contains an array of image objects which are set as the value of the state variable images.
If there’s an error during the API request, the .catch block logs the error to the console using console.error.
In the return block, we add a new div element with the class name container to wrap the images. The map() function is used to iterate over the images array which contains the image objects fetched from the Unsplash API.
For each image object in the images array an img element is created with the following attributes:
className=’images’: This sets the class name of each <img> element to ‘images.’ This class name will be used for styling purposes.
key={image.id}: The key attribute is used to help React efficiently update and render components. It should have a unique value for each element in the array, typically using a unique identifier like image.id.
src={image.urls.small}: This sets the src attribute of the <img> element to the URL of the image returned from Unsplash. image.urls.small likely contains a URL to a small-sized version of the image fetched from Unsplash.
alt={image.description}: This provides alternative text for the image, which is important for accessibility. In this case, it uses the description property from the returned image object.
The application renders some images when you type on the search bar. 😃
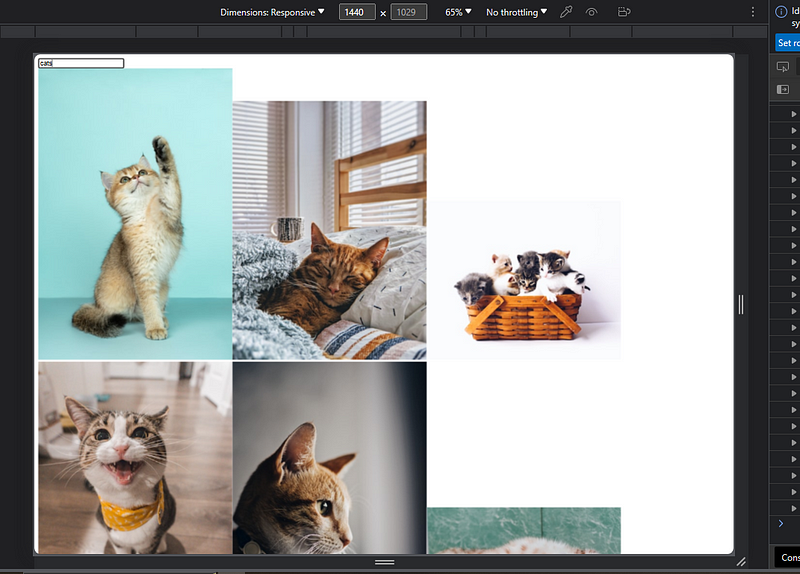
I won’t lie, it doesn’t look that great though and the constant re-rendering when typing is a bit annoying and buggy.
Let’s fix that:
Modifying the rendering of images
Modify the application so that it only renders images after the input is submitted by the user and not while they are typing. To achieve this, use the useRef() hook. The useRef() is used to store a mutable value that doesn’t cause a re-render when updated. It returns an object with a single property: current.
Here is the code implementation:
The onSubmit event is attached to the form element and a callback function search assigned to it. The search bar value is now stored in searchQuery.current avoiding re-renders when it changes. The callback function search is now responsible for updating the state variable searchItem and only does so when a submission is made.
With that fixed, time to style things up:
Adding styles
The styles will be written in the App.css file of the React project.
Start by styling the search bar section. To do that add class selectors to the form element as well as the input element.
<form onSubmit={search} className='searchForm'>
  <input placeholder='search image' onChange={handleChange} className='searchBar'/>
</form>
And now for some CSS magic:
The remaining part is now styling the appearance of the images rendered. The main challenge with that is the images will be of varying heights. This means placing them in a uniform grid would result in uneven spacing and a disjointed appearance.
The solution is to use a masonry layout. In a masonry layout, instead of sticking to a strict grid with gaps being left after shorter items, the items in the following row rise to fill those gaps.
In React, one of the ways to implement the masonry layout is by using the react-masonry-css library. It’s easy to use and doesn’t require a lot of configuring to get started.
In the terminal, in the project directory run the command:
npm install react-masonry-css
This adds the library to the project’s dependencies. Now you can import it into the App.js file where you will use it.
The code is as follows:
A breakdown:
React-masonry-css allows you to define breakpoints, which determine how many columns your masonry grid should have at different screen sizes. The breakPoints object defines these breakpoints based on the desired number of columns.
To create the masonry grid incorporate the Masonry component by nesting the elements to be organized within it. breakpointCols is where you pass the previously defined breakPoints object to configure the number of columns based on screen width.
className and columnClassName allow you to apply CSS classes for styling the grid and its columns. Do not change their values in this case as they are already predefined by the implementation of the masonry layout.
Now, for the real magic to happen:
The react-masonry-css library provides the my-masonry-grid, my-masonry-grid_column, and the my-masonry-grid_column > div CSS styles by default in the library’s site documentation. Thus, all that is needed is to copy and paste it to your code.
These CSS styles target the images, set the grid layout, adjust column spacing, and add some visual polish.
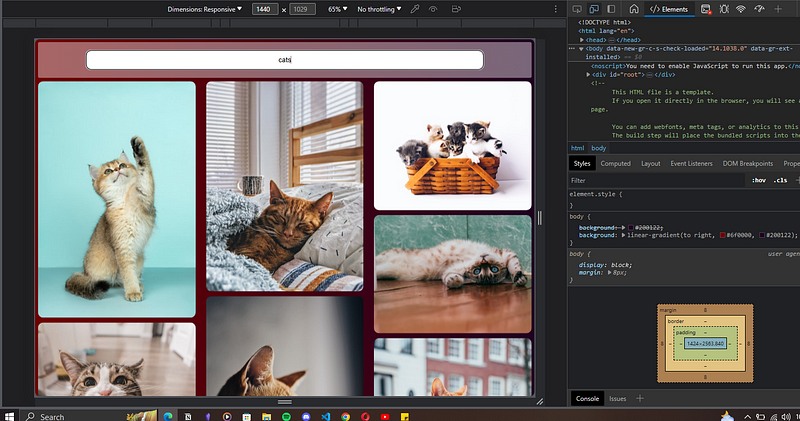
With everything in place, the images are now organized in a nice responsive masonry layout.
One loose end
There’s just one last thing. What happens if you can’t find the item searched? Panic! A blank page!
It’s a good idea to address that. The solution:
- In the ImageGallery component, create a
searchPerformedstate variable and initialize it tofalse:
const [searchPerformed, setSearchPerformed] = useState(false)
- When a search is performed (i.e., in the
searchfunction), setsearchPerformedtotrue:
const search = (event) => {
  event.preventDefault()
  setSearchItem(searchQuery.current)
  setSearchPerformed(true)
}
- In your conditional rendering, check if
searchPerformedis true and that the images array returned is empty before rendering the "No results" message:
return (
  <div>
    <form onSubmit={search} className='searchForm'>
      <input ref={searchInput} placeholder='Search images...' onChange={handleChange} className='searchBar'/>
    </form>
    {searchPerformed && images.length === 0 ? (
      <p className="Notification">No results found for "{searchItem}"</p>
    ) : (
      <Masonry
        breakpointCols={breakpointColumnsObj}
        className="my-masonry-grid"
        columnClassName="my-masonry-grid_column"
      >
        {images.map(image => (
          <div key={image.id}>
            <img className='images' src={image.urls.small} alt={image.description} />
          </div>
        ))}
      </Masonry>
    )}
  </div>
);
The “No results” message will only be displayed after a search has been performed and if there are no matching results. Adding the class selector to the message allows you to style how it is displayed.
In Conclusion
React’s component-based architecture as well as hooks allow us to create our application with quite a lot of ease and simplicity. The Unsplash API as seen is quite simple to use and reliable. Furthermore, you got to learn a number of things like:
Applying the useRef and useEffect hooks,
Working with the react-masonry-css library and
Making HTTP requests with Axios.
I hope you enjoyed crafting this little project as much as I did. It’s a fun and insightful addition to one’s developer portfolio. The repository for this project can be found here.
Feel free to implement your own customizations and let me know if I missed anything. Happy coding!

